人脸识别 之 Dlib库(HOG、CNN)人脸识别
- 人脸识别
- 2021-08-31
- 106热度
- 0评论
借助Dlib库捕获摄像头中的人脸,提取人脸特征,获取128维的人脸特征向量,通过计算欧氏距离来和预存的人脸特征进行对比,达到人脸识别的目的。
Dlib库是人脸识别最常用的软件包之一,其中内置了两种人脸检测方法:
1、HOG+线性SVM 人脸检测器:精确高效的人脸检测算法,精确度比 MMOD—CNN 稍低一些(不能容忍视角旋转的变化),但要高于 OpenCV 的 Haar级联。
2、MMOD-CNN 人脸检测器:既高度准确又非常健壮,能够从不同的视角、光照条件和遮挡条件下检测人脸。可以在 NVIDIA GPU 上运行,使其速度超快!该模型需要更多的计算(速度较慢)。
基于 CNN 模型比基于 HOG 特征模型的人脸检测准确度更高,但是需要更多的计算资源,即在 GPU 上运行才可有较好的运行速率。
当前使用 python 3.7 版本。如果采用源码方式安装需要先安装 cmake,稍麻烦,这里直接安装 whl。
1、下载、安装 Dlib
点击下载:Dlib相关文件.zip 官网:http://dlib.net/files/
pip install dlib-19.17.99-cp37-cp37m-win_amd64.whl
2、测试 Dlib 是否使用GPU:
import dlib
print(dlib.DLIB_USE_CUDA) # 返回 False 则 未使用 GPU
3、Python 源码、测试效果
# coding=utf-8
import cv2
import dlib
import numpy as np
import os


# 定义一个计算Euclidean距离的函数
def get_distance(a, b):
    return np.linalg.norm(a - b, ord=2)


# 人脸分类器(HOG)
detector = dlib.get_frontal_face_detector()
# 人脸分类器(CNN)
# detector = dlib.cnn_face_detection_model_v1("mmod_human_face_detector.dat")
# 人脸关键点检测器,68个关键点检测模型
predictor = dlib.shape_predictor("shape_predictor_68_face_landmarks.dat")
# 人脸识别模型,根据关键点检测结果进一步得到128维向量表示
facerec = dlib.face_recognition_model_v1("dlib_face_recognition_resnet_model_v1.dat")

face_database_folder_path = "../face_img"
face_database_descriptors = []
face_database_names = []
index = 1
for filename in os.listdir(face_database_folder_path):
    if filename.endswith('.jpg'):
        print('处理第 %s 张图片' % index)
    else:
        continue
    image = cv2.imread(face_database_folder_path + '/' + filename)
    gray_img = cv2.cvtColor(image, cv2.COLOR_BGR2GRAY)
    # 检测人脸(使用灰度图)
    faces = detector(gray_img, 1)
    print('人脸数:{}'.format(len(faces)))
    # 遍历检测到的人脸
    for i, item in enumerate(faces):
        # item = item.rect  # 基于CNN
        # 通过人脸矩形框获取人脸的关键点(68个关键点)
        pot = predictor(image, item)
        # 人脸识别模型通过关键点获取128维的人脸特征向量
        face_descriptor = facerec.compute_face_descriptor(image, pot)
        face_database_descriptors.append(np.array(face_descriptor))
        face_database_names.append(filename.split('.')[0])
    index += 1

cameraCapture = cv2.VideoCapture(0)
success, frame = cameraCapture.read()
while success and cv2.waitKey(1) == -1:
    success, frame = cameraCapture.read()
    # frame = cv2.resize(frame, (320, 240))
    # clahe = cv2.createCLAHE(clipLimit=2.0, tileGridSize=(8, 8))  # 生成直方图
    # clahe_image = clahe.apply(gray)
    gray_img = cv2.cvtColor(frame, cv2.COLOR_BGR2GRAY)
    # 检测人脸(使用灰度图),1 表示将图片放大一倍,便于检测到更多人脸
    faces = detector(gray_img, 1)
    # 遍历检测到的人脸
    for i, item in enumerate(faces):
        # item = item.rect  # 基于CNN
        # 通过人脸矩形框获取人脸的关键点(68个关键点)
        pot = predictor(frame, item)
        # 人脸识别模型通过关键点获取128维的人脸特征向量
        face_descriptor = facerec.compute_face_descriptor(frame, pot)

        dist = []
        for item_face in face_database_descriptors:
            # 测试图片和本地图片欧式距离
            distance = get_distance(face_descriptor, item_face)
            dist.append(distance)
        c_d = dict(zip(face_database_names, dist))
        cd_sorted = sorted(c_d.items(), key=lambda item: item[1])
        if cd_sorted[0][1] < 0.38:
            cv2.putText(frame, cd_sorted[0][0], (item.left(), item.top()), cv2.FONT_HERSHEY_SIMPLEX, 1, 255, 2)
            print(cd_sorted)

        for pt in pot.parts():
            cv2.circle(frame, (pt.x, pt.y), 1, (0, 0, 255), thickness=2)

        frame = cv2.rectangle(frame, (item.left(), item.top()), (item.right(), item.bottom()), (255, 0, 0), 2)
    cv2.imshow("Camera", frame)

cameraCapture.release()
cv2.destroyAllWindows()
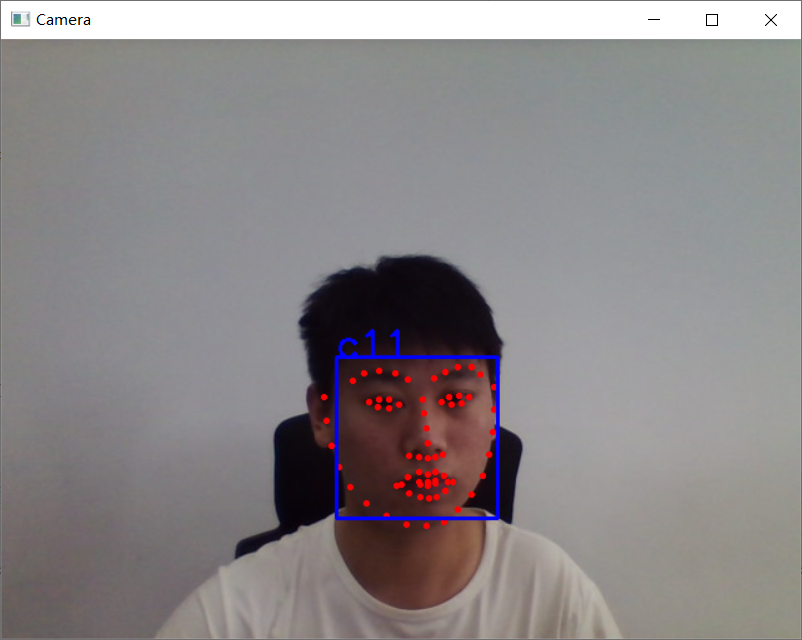
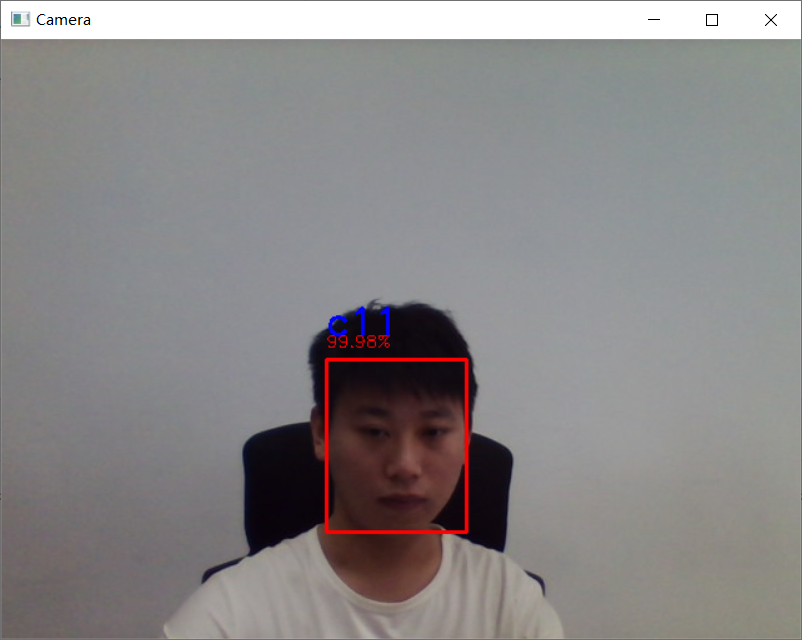
此次未使用 GPU,测试不如 OpenCV 流畅,但比 OpenCV 识别效果好。效果图如下:

 鲁ICP备19063141号
 鲁公网安备 37010302000824号